Receipt Printer
Sorry to hear that the receipt printer isn't working. Try these steps to get it working:
1. Check that the printer has paper.
2. Be sure that the paper is inserted correctly. The paper should feed from the bottom.
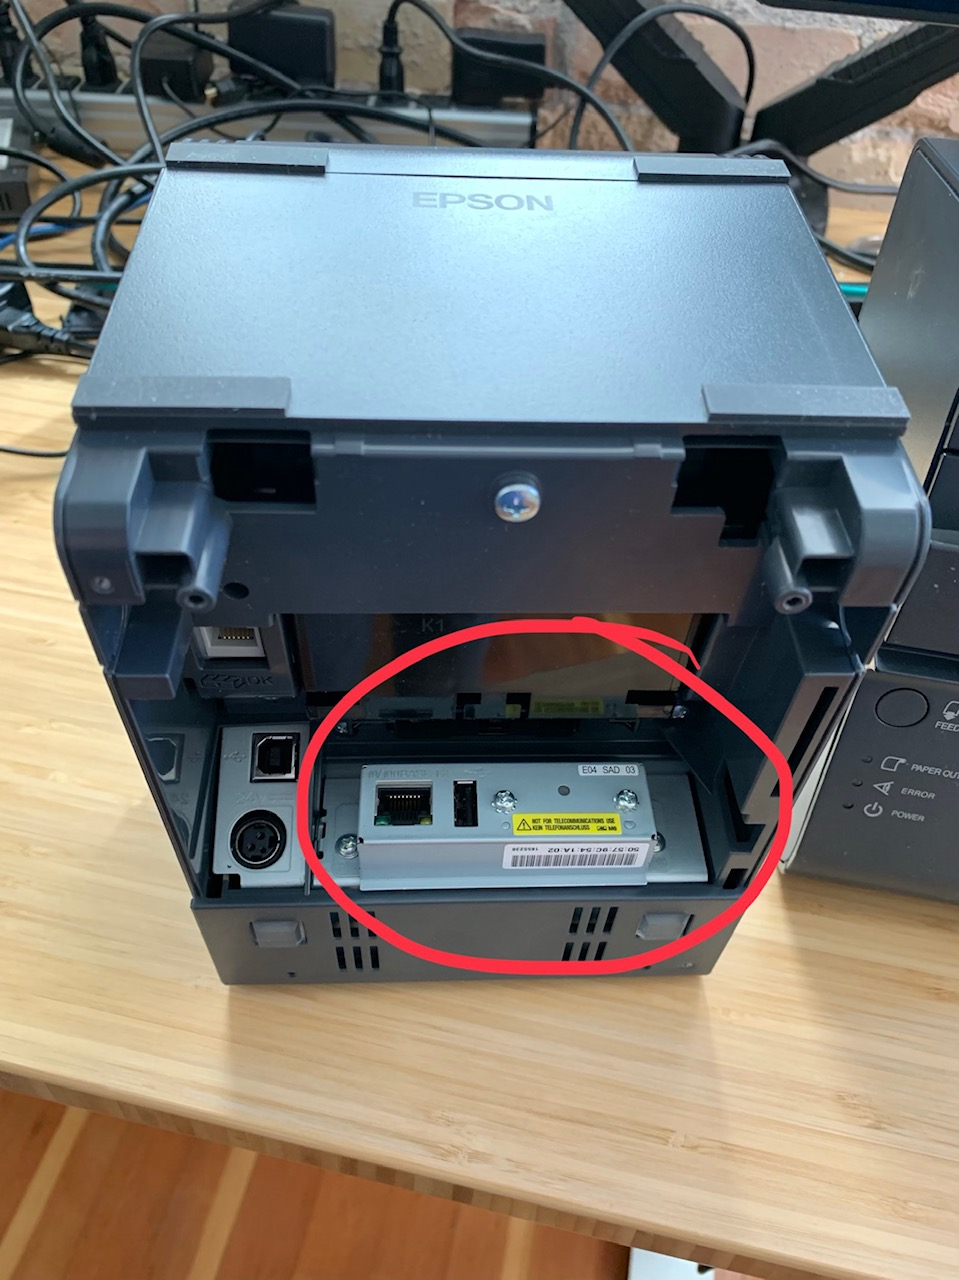
3. Check to make sure that the ethernet cable is properly and securely connected to both the printer and cash drawer.
4. Check that the power cord is properly and securely connected to both the printer and power outlet.
5. Try turning the printer off then on again. You can do this using the power switch and/or unplugging the power cord.

Factory Reset your Receipt Printer (if Troubleshooting fails)
In the event that the printer still will not print or function properly, you may need to factory reset the printer to its default settings. Please reach out to support before following these instructions.
Performing the Reset
Turn the printer off.
Find and hold down the reset button on the bottom of the printer with a pen or paperclip.

Hold down the Reset button and power the device on while still holding down the reset button.
A message will print indicating the reset is being performed. Release the reset button and the device will restart.
Label Printer
TABLE OF CONTENTS
- My Label Printer Isn't Working
- Tips & Tricks - Wanna Become a Pro?
- Putting Paper Into the Printer
- Last Characters getting pushed to a new line
- Calibrating Label Printers
- Factory Reset (If all troubleshooting fails)
My Label Printer Isn't Working
The most common fix to this is simply opening and closing the lid to the printer. If you do this and it still is not working, the following steps will help you get it back up and running:
- Please check to ensure that the printer labels have been inserted correctly (feeding from the bottom).
- Check that there are no labels jammed anywhere in the printer.
- Check that the label sensors are not covered in anyway (there are 2 plastic parts on the inside of the printer, these are the sensors)
- Check that the printer cables are properly connect.
- Try turning the printers off, then on again. This can be done with the power switch, or by unplugging the cable then plugging it back in.
- If you've gone through these steps and it still isn't working, please scroll down to the "Calibrating Label Printers" section and follow those steps.

FADED LABELS
If your labels are faded, it is likely caused by the build up of sticky residue on your sensor bar(photo below). We recommend cleaning the bar thoroughly with rubbing alcohol. The sticky residue needs the help of the alcohol to break it down.

Roll Paper Cover Won’t Open or Paper isn’t cutting correctly.
Turn off the Printer.
Insert a tool such as a screwdriver into the slots on both sides of the printer, and lift the cover in the direction of the arrow in the illustration below to remove it.
Turn the knob in the direction of the arrow in the illustration below, by using a pen or tweezers, until you see a triangle mark in the opening. Replace the cover.


Tips & Tricks - Wanna Become a Pro?
Peeling Labels Off
When peeling the labels off of the liner, you should know a few things before you start tearing away and putting them on drinks or products!
- Be Careful! - being violent or tearing labels off really close to the sensor will likely cause it to jam. Especially with that very first label that prints super close to the sensor, using extra caution when peeling will reduce errors and increase consistency!
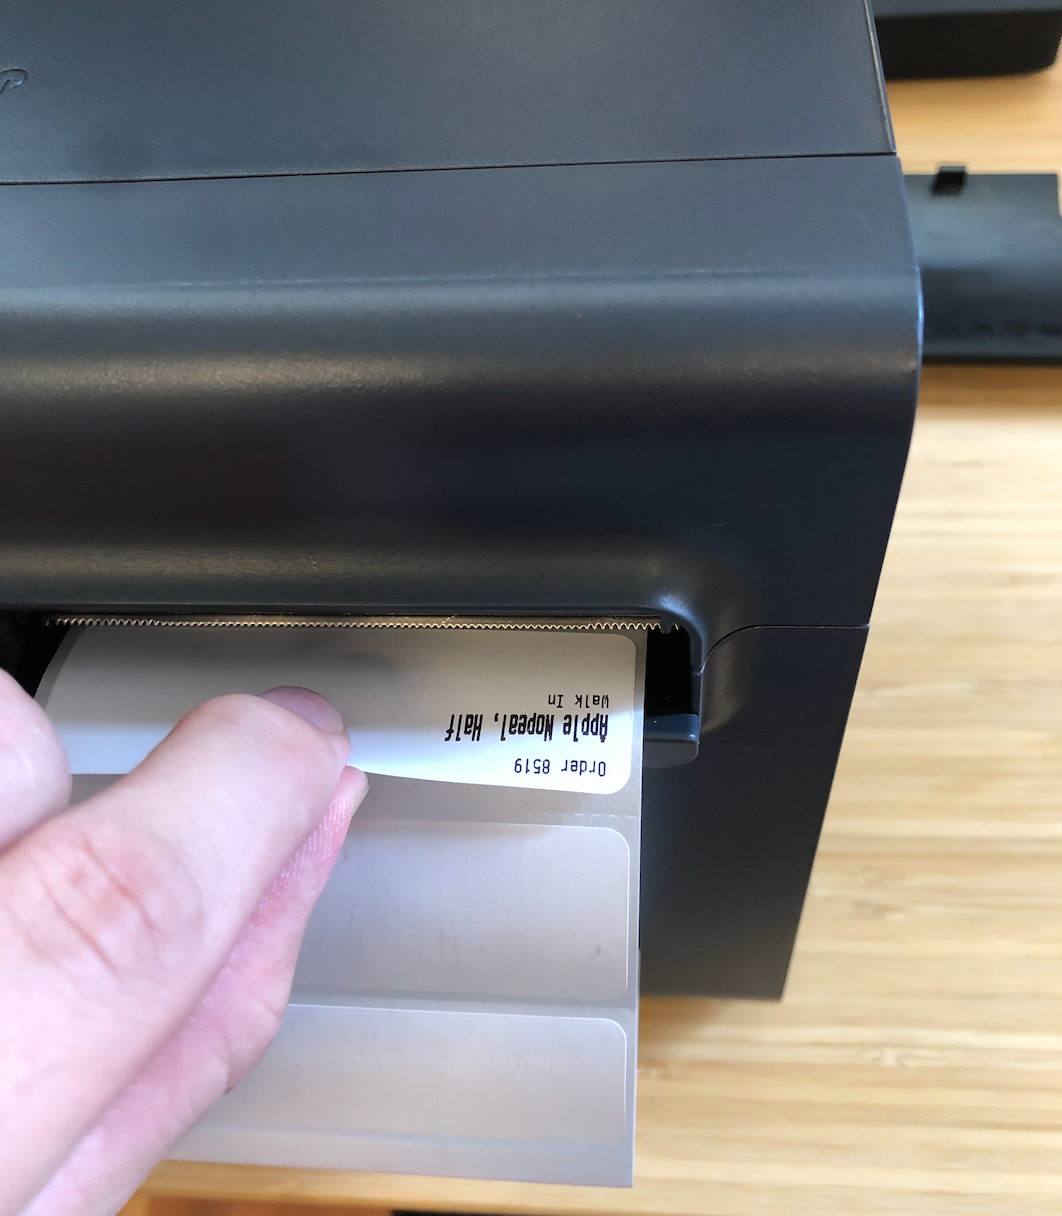
- Peel From the Middle, Not the Side - Peeling the label from the middle, not the side, helps to ensure a smooth peel. See the picture to the right for reference!
- Don’t Tug on the Labels! - If you tug or pull the liner excessively while peeling, the likelihood of the printer jamming will go up.
If your printer is jamming often, it’s likely the way that you are peeling the labels. Please train your employees to peel it in a way that doesn’t mess with the sensor or cutter.
Putting Paper Into the Printer
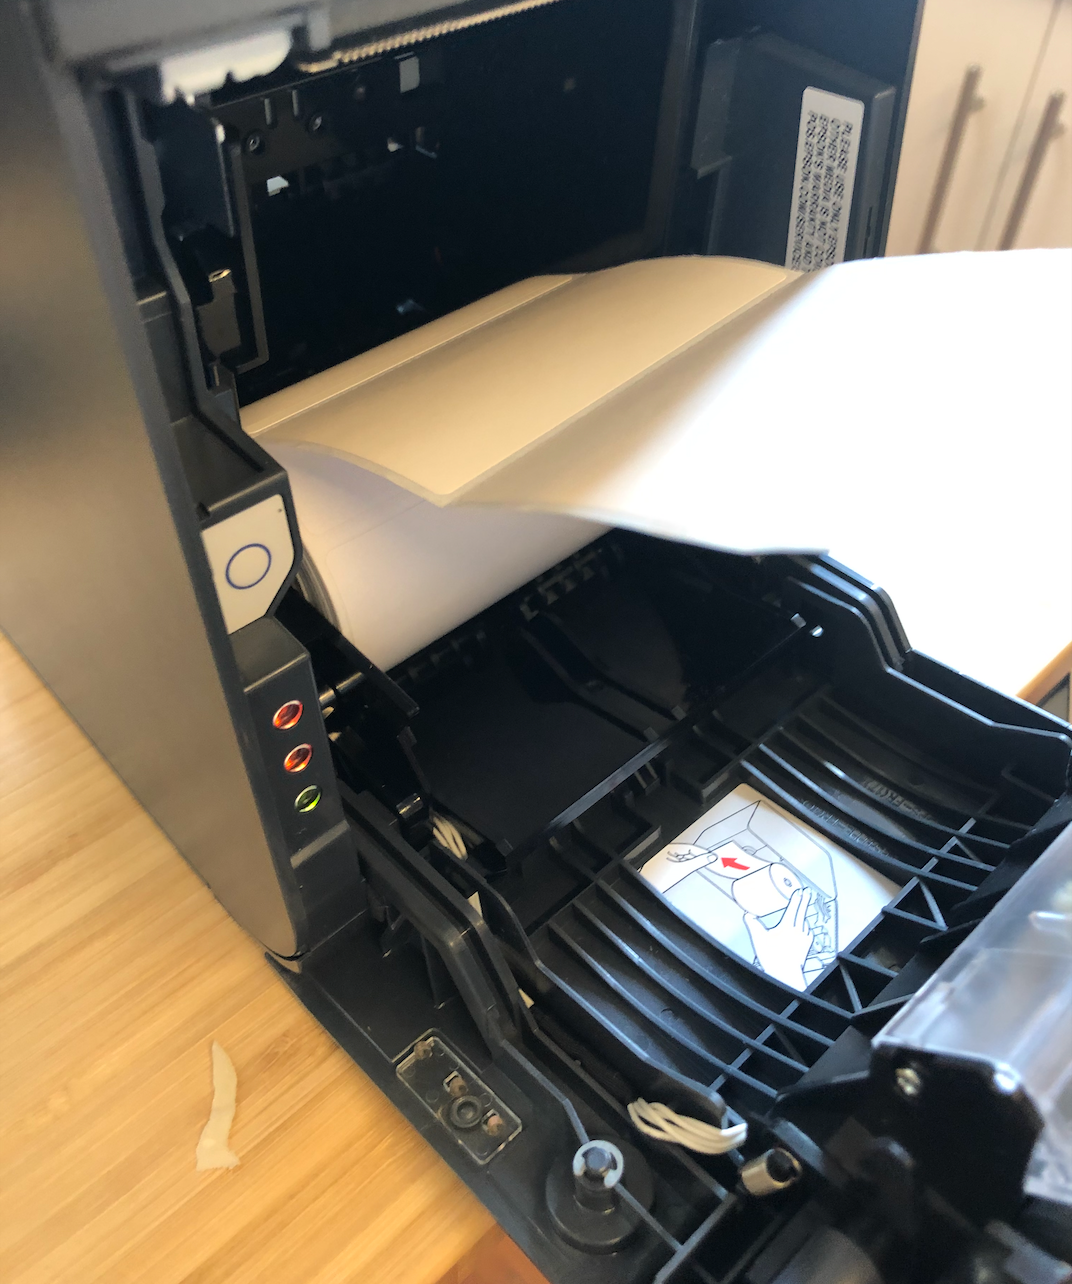
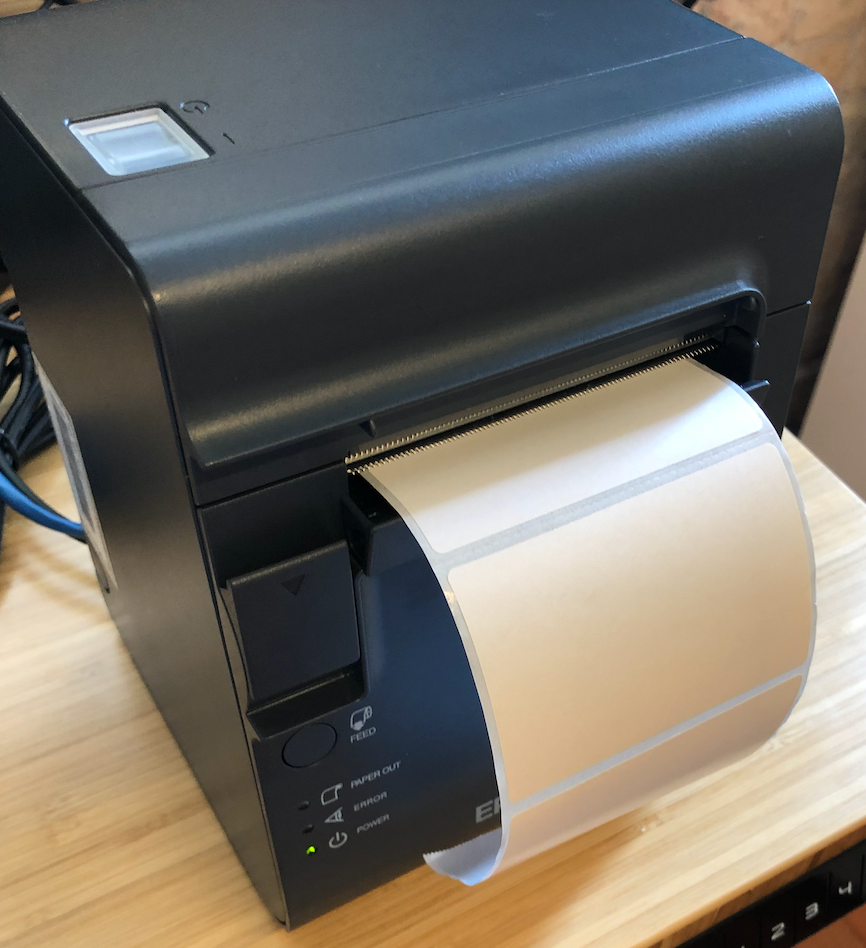
The labels have to be put in a certain way in order for the printer to work, please see the pictures below for reference:
- Make sure the labels are coming off the top of the roll
- Make sure the labels are facing out as the paper comes out of the printer
- The labels print upside down when they come out of the printer. This is normal! This means you've put the paper in the right way
Last Characters getting pushed to a new line
There are only so many characters that can fit on a line of label paper. Sometimes this setting comes set incorrectly from the factory, and a factory reset doesn't seem to help. There is a configuration sequence you can do to correct this!

We have to start with the Printer off, paper inserted, and the lid closed.
With the printer off, hold in the "Paper Feed" button and continue to hold while switching the printer on. After a blank receipt is fed out, let go of the button.
A long page of some settings will be printed.

After this prints, HOLD the feed button for 1 second. This enters the "Mode Selection" menu.

In the "Mode Selection" menu, press the Feed Button two times, then Hold the button for 1 second on the third press. (This selects Option 2 "Customize Value Settings", and the 1 second Hold confirms the selection)
This will open the "Customize Value Settings" menu which looks like this:

In the "Customize Value Settings" menu, we want to select Option 12: Printing digits number. This is done by pressing the Feed Button twelve times, then Holding for 1 second to confirm.

If you are not in the "Printing digits number" menu, Hold the Feed Button for 1 second to Go Back
In the "Printing digits number" menu, note which selection is currently active, indicated by an asterisk or star.
If 42 digits mode is selected, press the feed button two times to select 44 digits, then Hold for 1 second to confirm
If 44 digits mode is selected, press the feed button three times to select 48 digits, then Hold for 1 second to confirm

Typically, "44 digits" should be the setting used. However, if you're printer is already on 44 digits, and a character is being cut off, like the example first shown in this section, you'll want to select 48 digits.
When you see a message print that includes "Saved. you can turn off the printer", turn the printer off for 10 seconds, then turn it back on. After it comes back online in the system, test printing a label to see if the characters are still cut off.
Calibrating Label Printers
Here are the steps to calibrate your printer to the specific paper you are using:
- Turn off printer
- Open paper door
- Hold the 'Feed' button on the inside
- While holding the feed button, turn on the printer until both orange lights illuminate
- Press the 'Feed' button 6 times
- Close door with paper correctly in place

Factory Reset (If all troubleshooting fails)
After you've gone through all troubleshooting processes and recalibration steps, the last resort is the following:
- Turn the printer off
- With a small sharp object (tip of pen or pin) press the button below and hold. (found underneath printer)
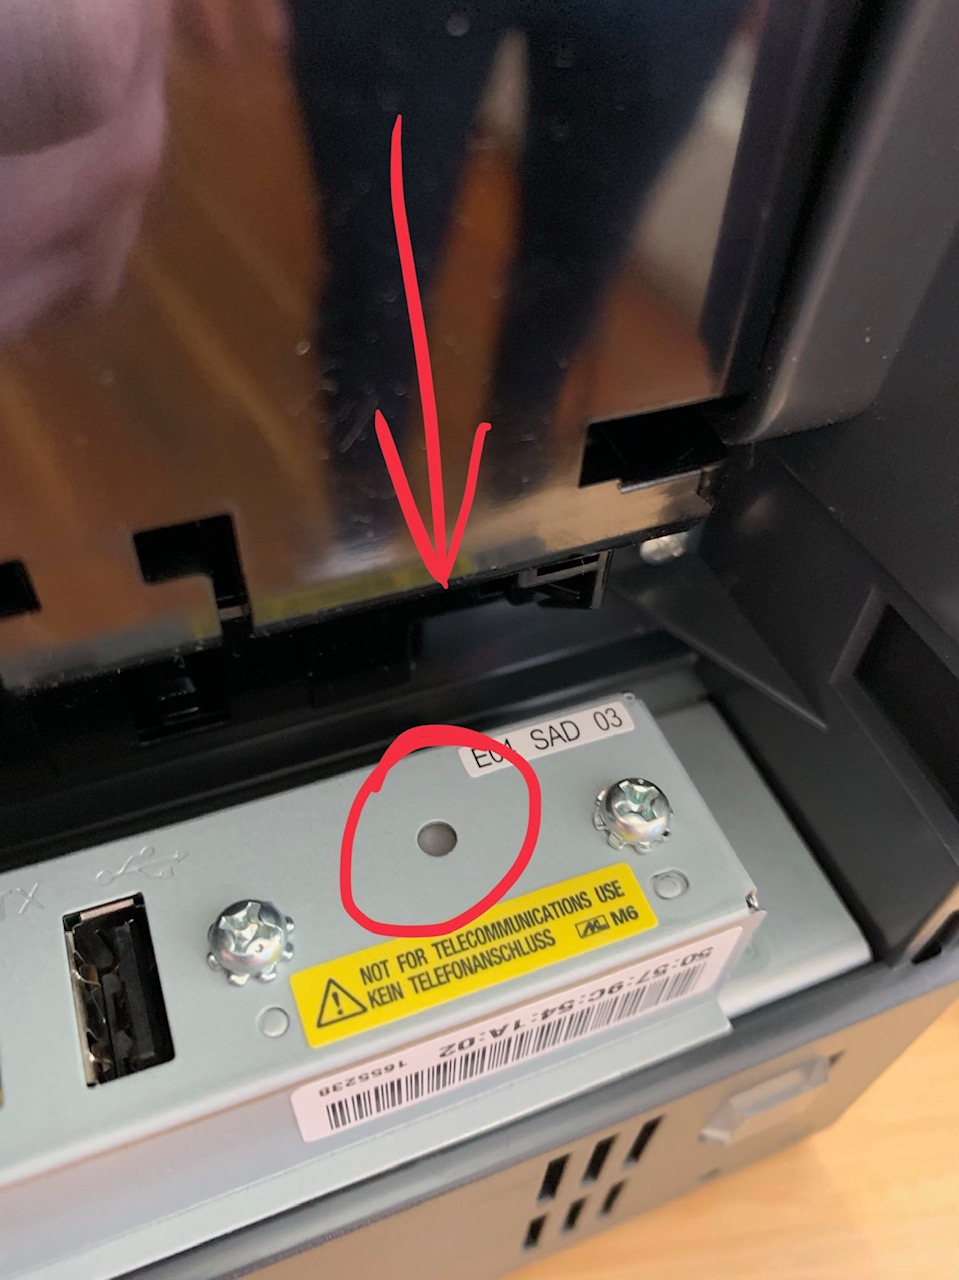
- While holding the reset button, turn the printer on and continue holding until warning labels print.
- Once the warning label prints, you can let go of the reset button. Do not touch until the printer prints an IP address label.
- Once you have the IP address label, contact Crisp to finish the reset process. 801-503-0032.
Was this article helpful?
That’s Great!
Thank you for your feedback
Sorry! We couldn't be helpful
Thank you for your feedback
Feedback sent
We appreciate your effort and will try to fix the article